- 1-807-228-1532
- support@dnb3d.ca
Free shipping on orders over $175
New Products added Daily
Ready to Ship | Father’s Day Gifts | Custom Orders
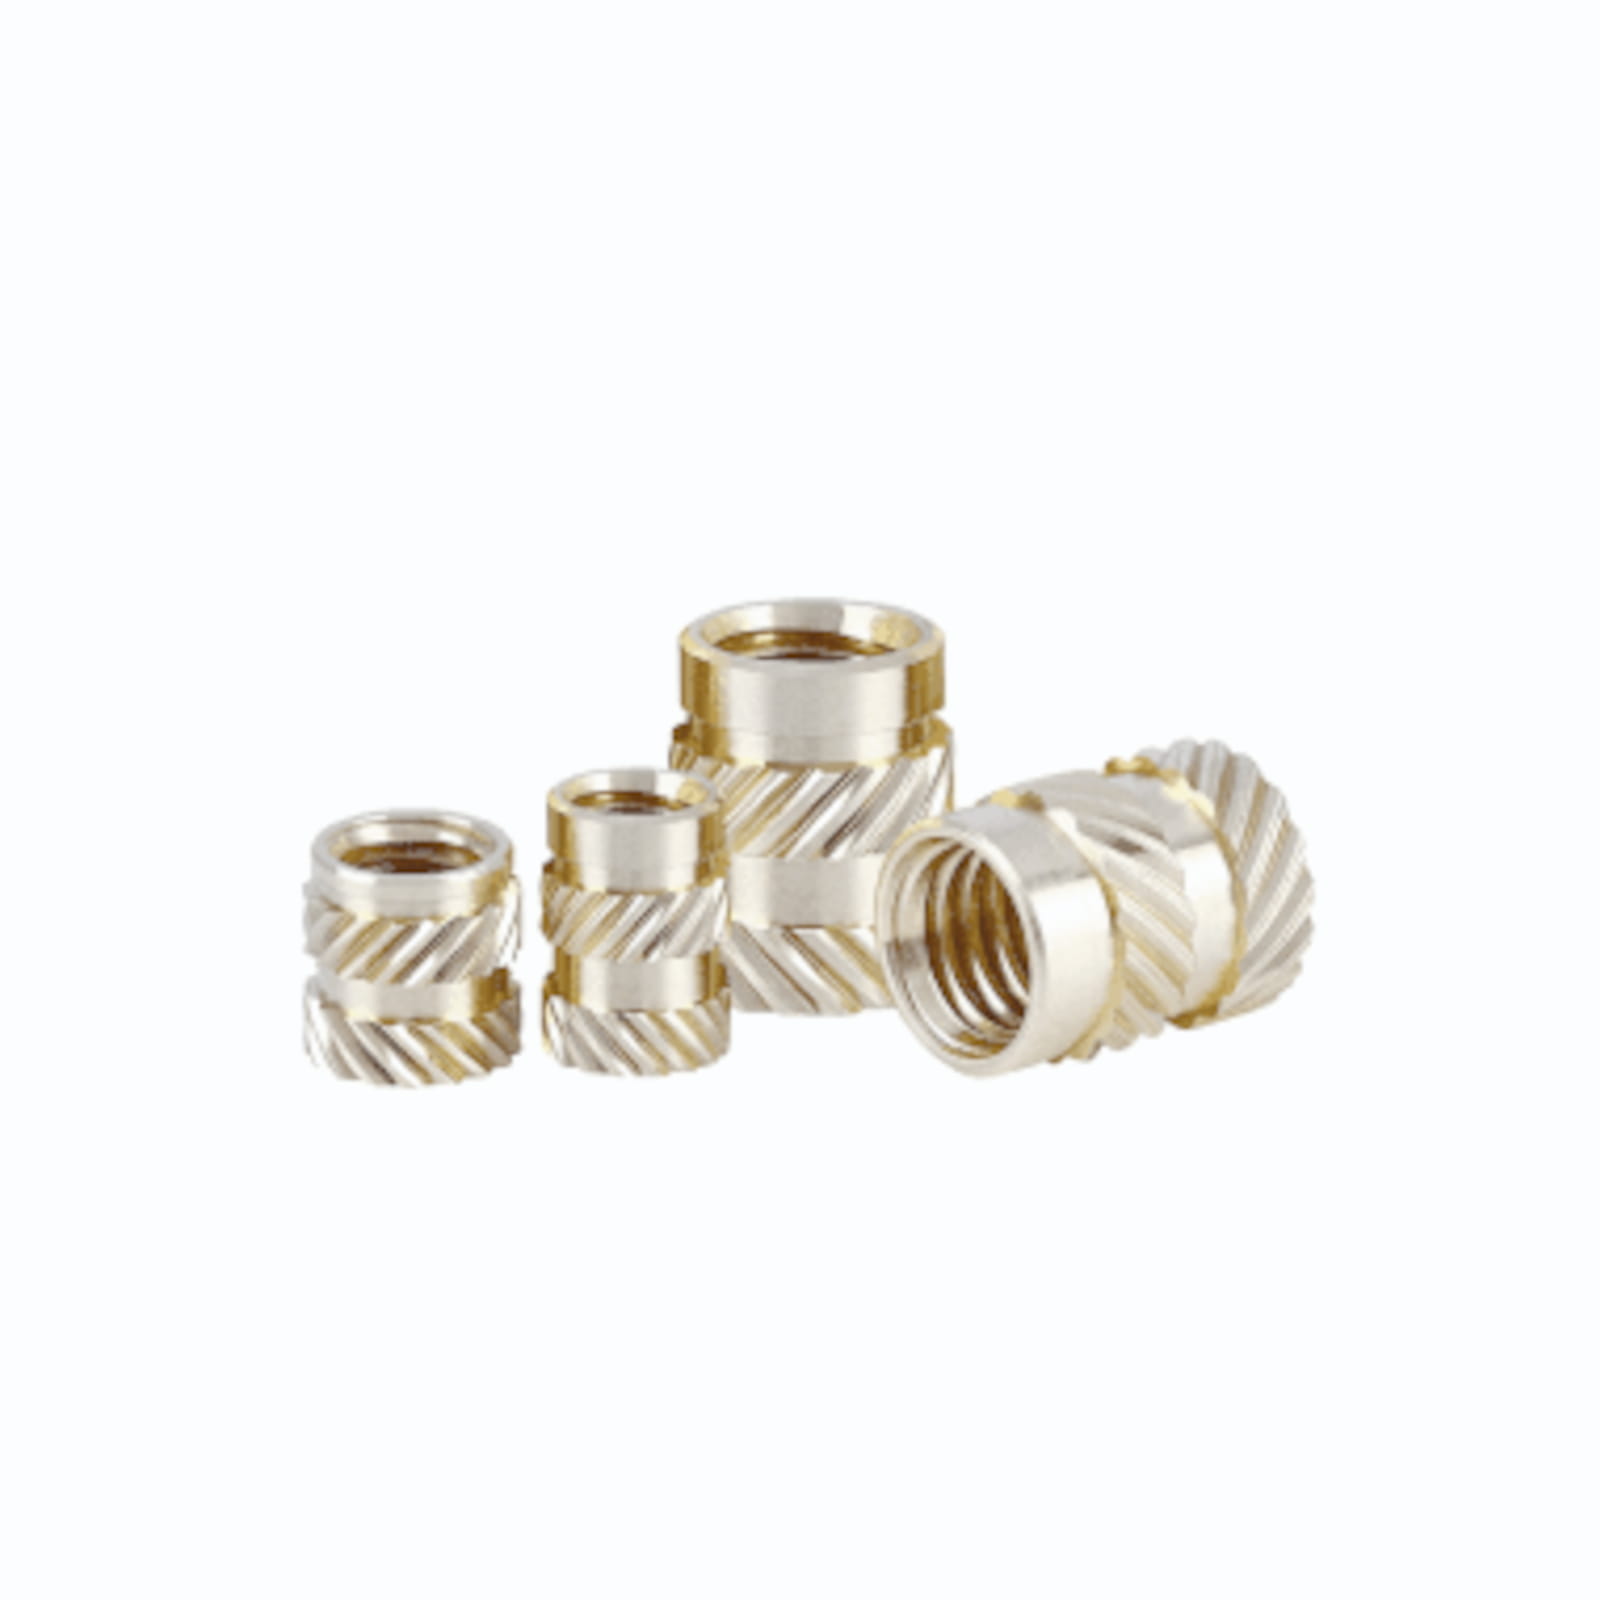

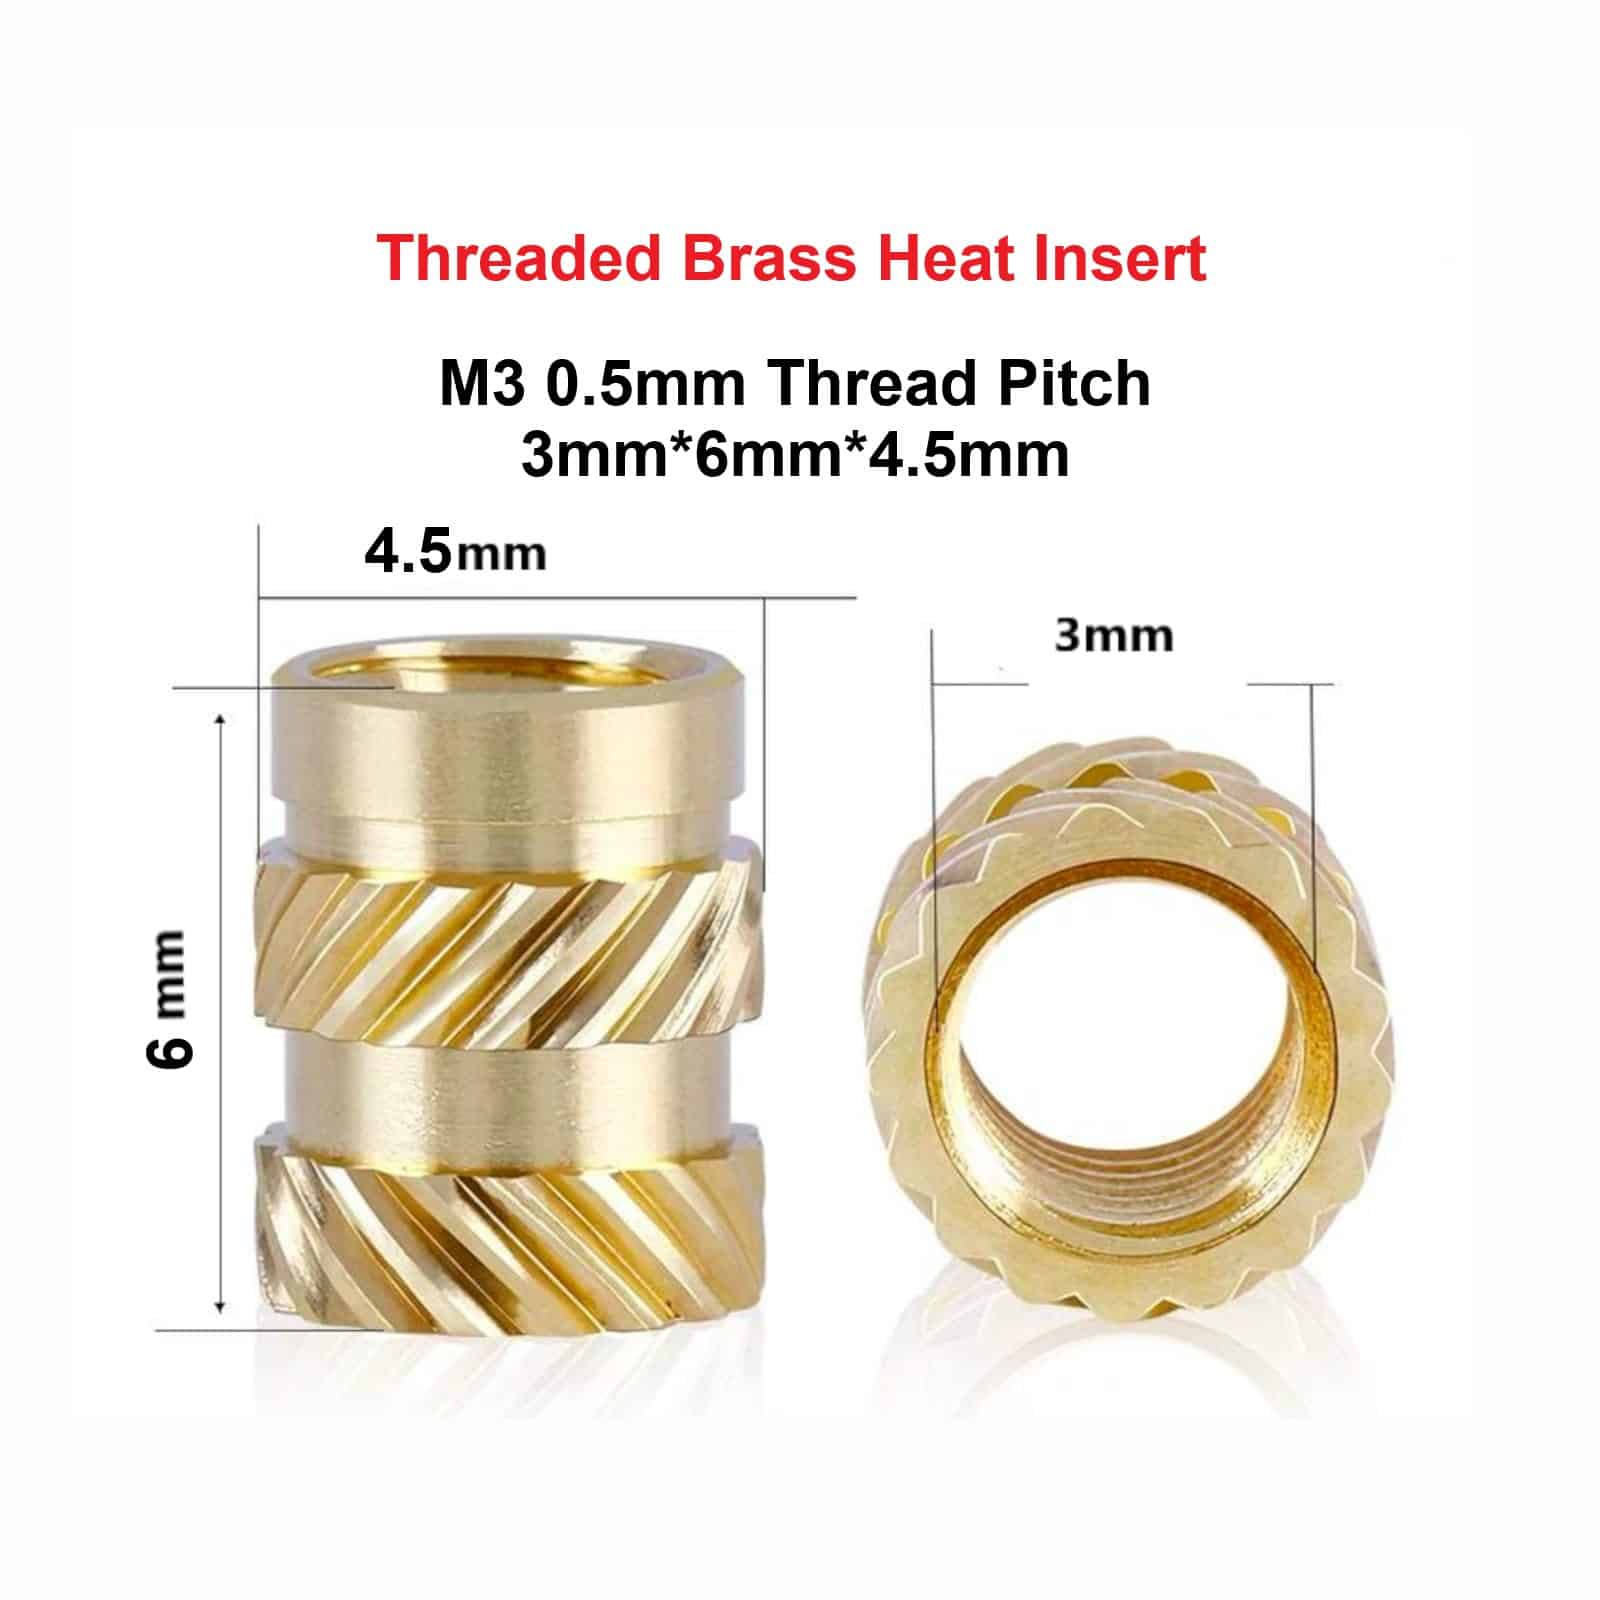

Threaded Brass Heat Inserts, also called heat set brass inserts, are used to create strong reusable metal threads inside compatible plastic parts. They are a practical fastening solution for 3D printed components, plastic repair work, brackets, fixtures, electronics enclosures, printer parts, jigs, covers, and custom mechanical assemblies.
Instead of threading screws directly into plastic, brass heat inserts allow the part to accept machine screws more reliably. This gives your project a cleaner, more professional fastening point and makes repeated assembly, disassembly, servicing, and maintenance easier. They are especially useful where plastic threads may strip, wear out, or need reinforcement.
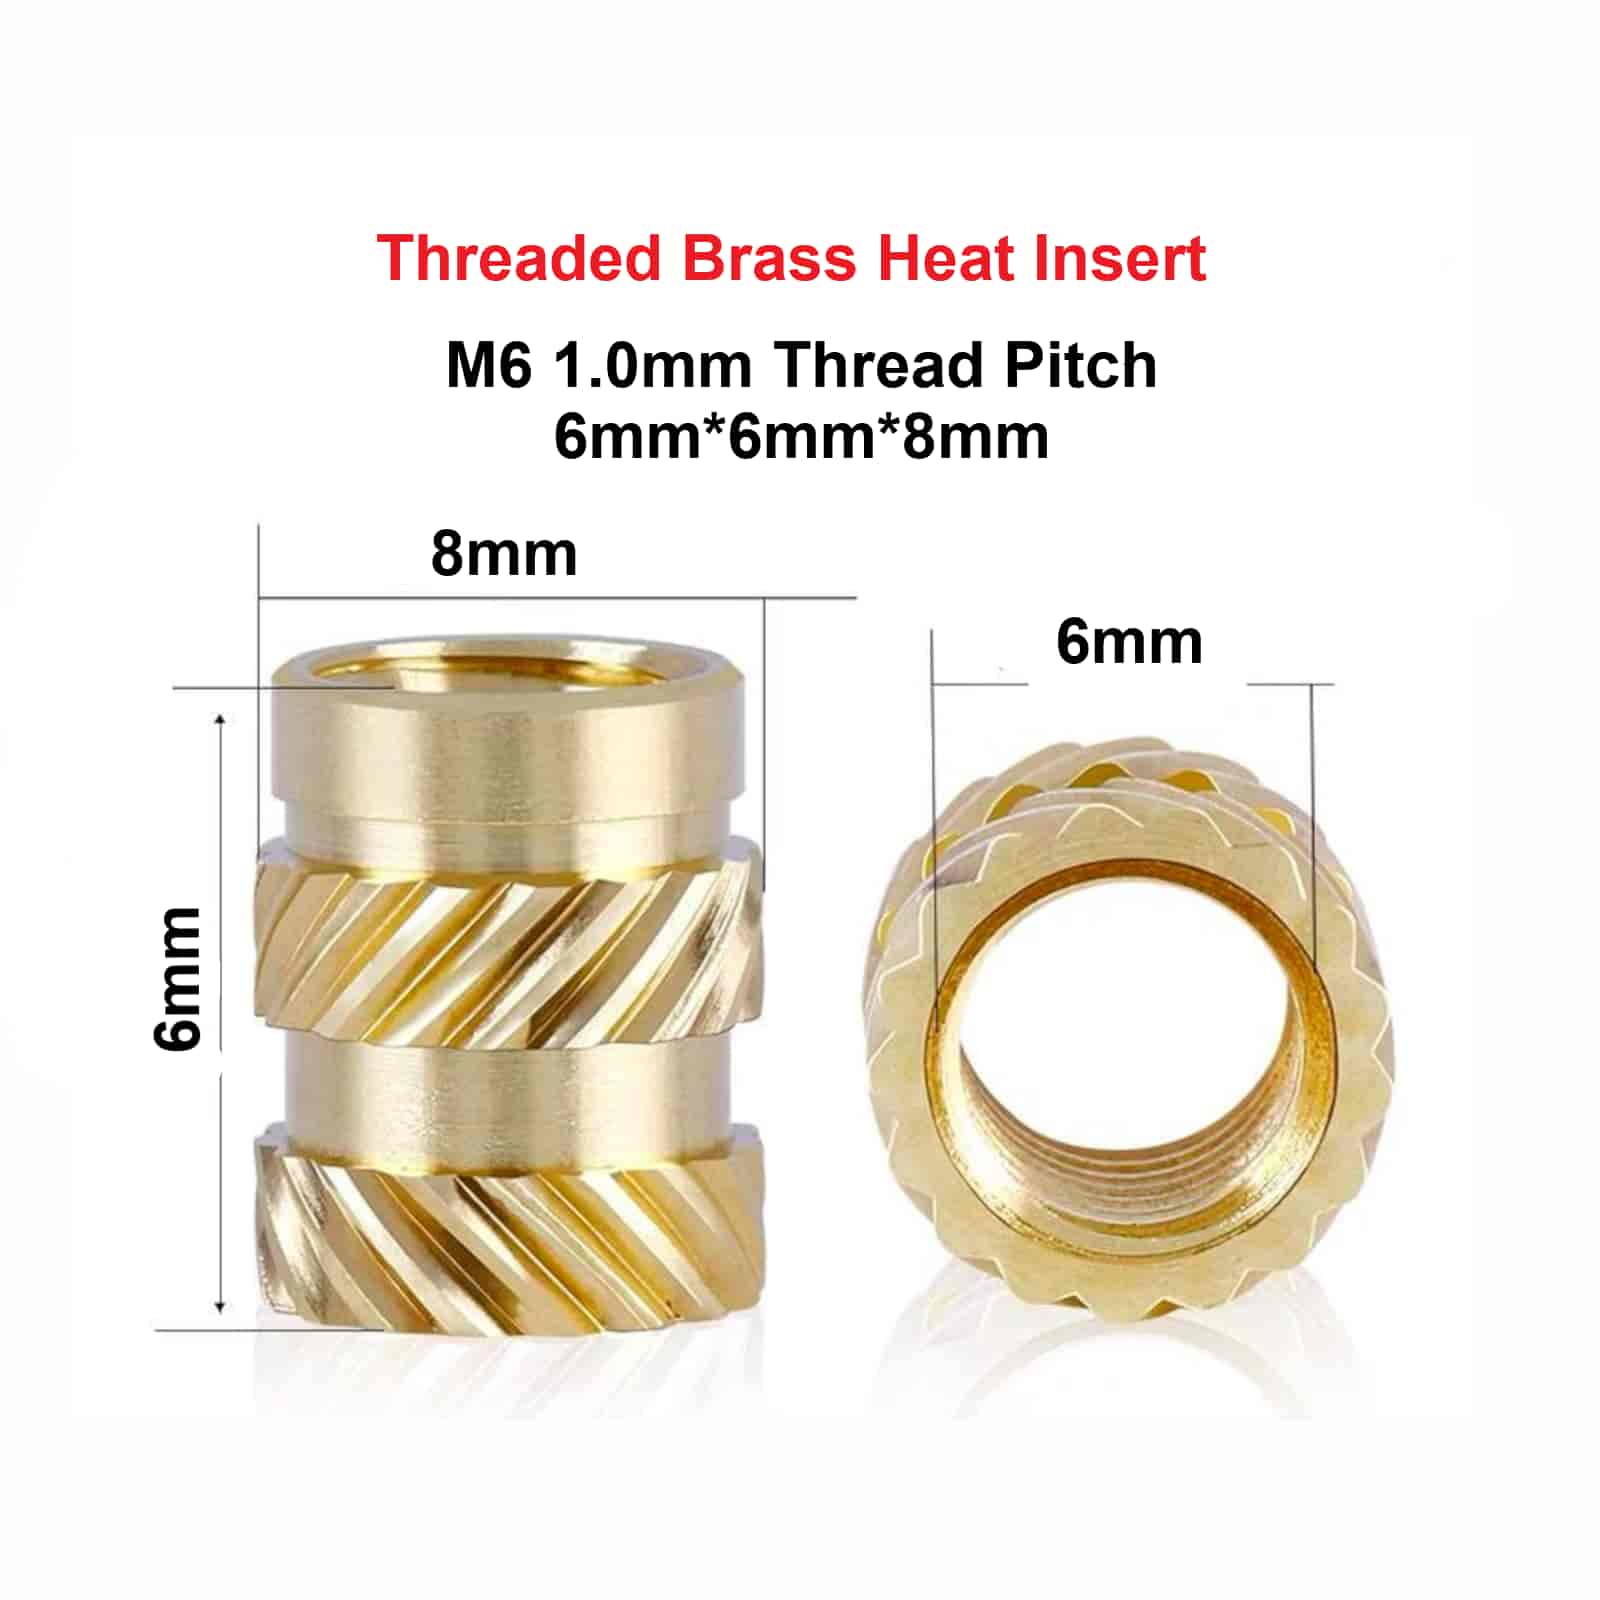
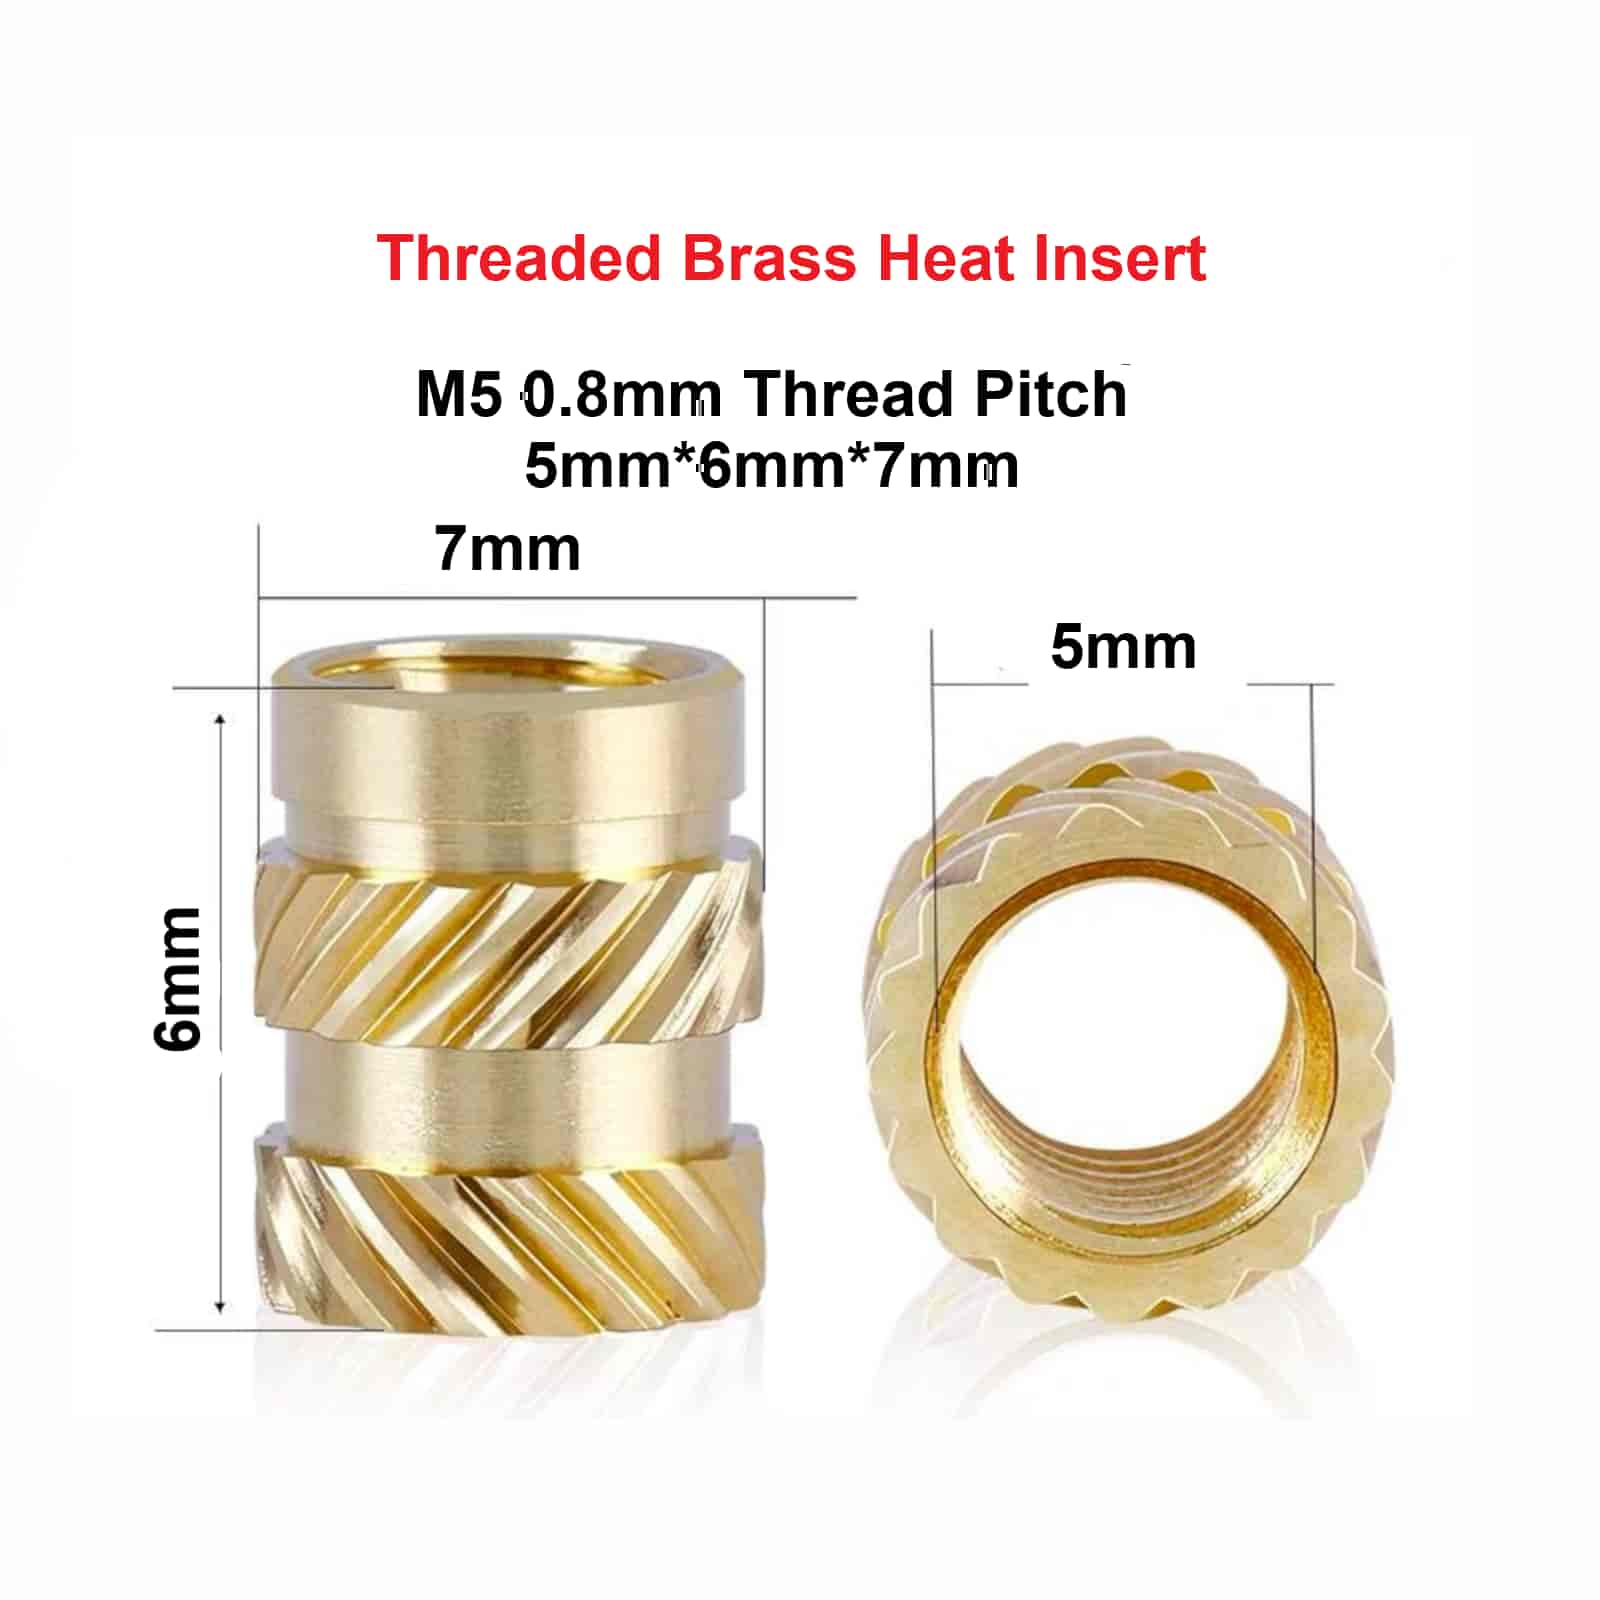
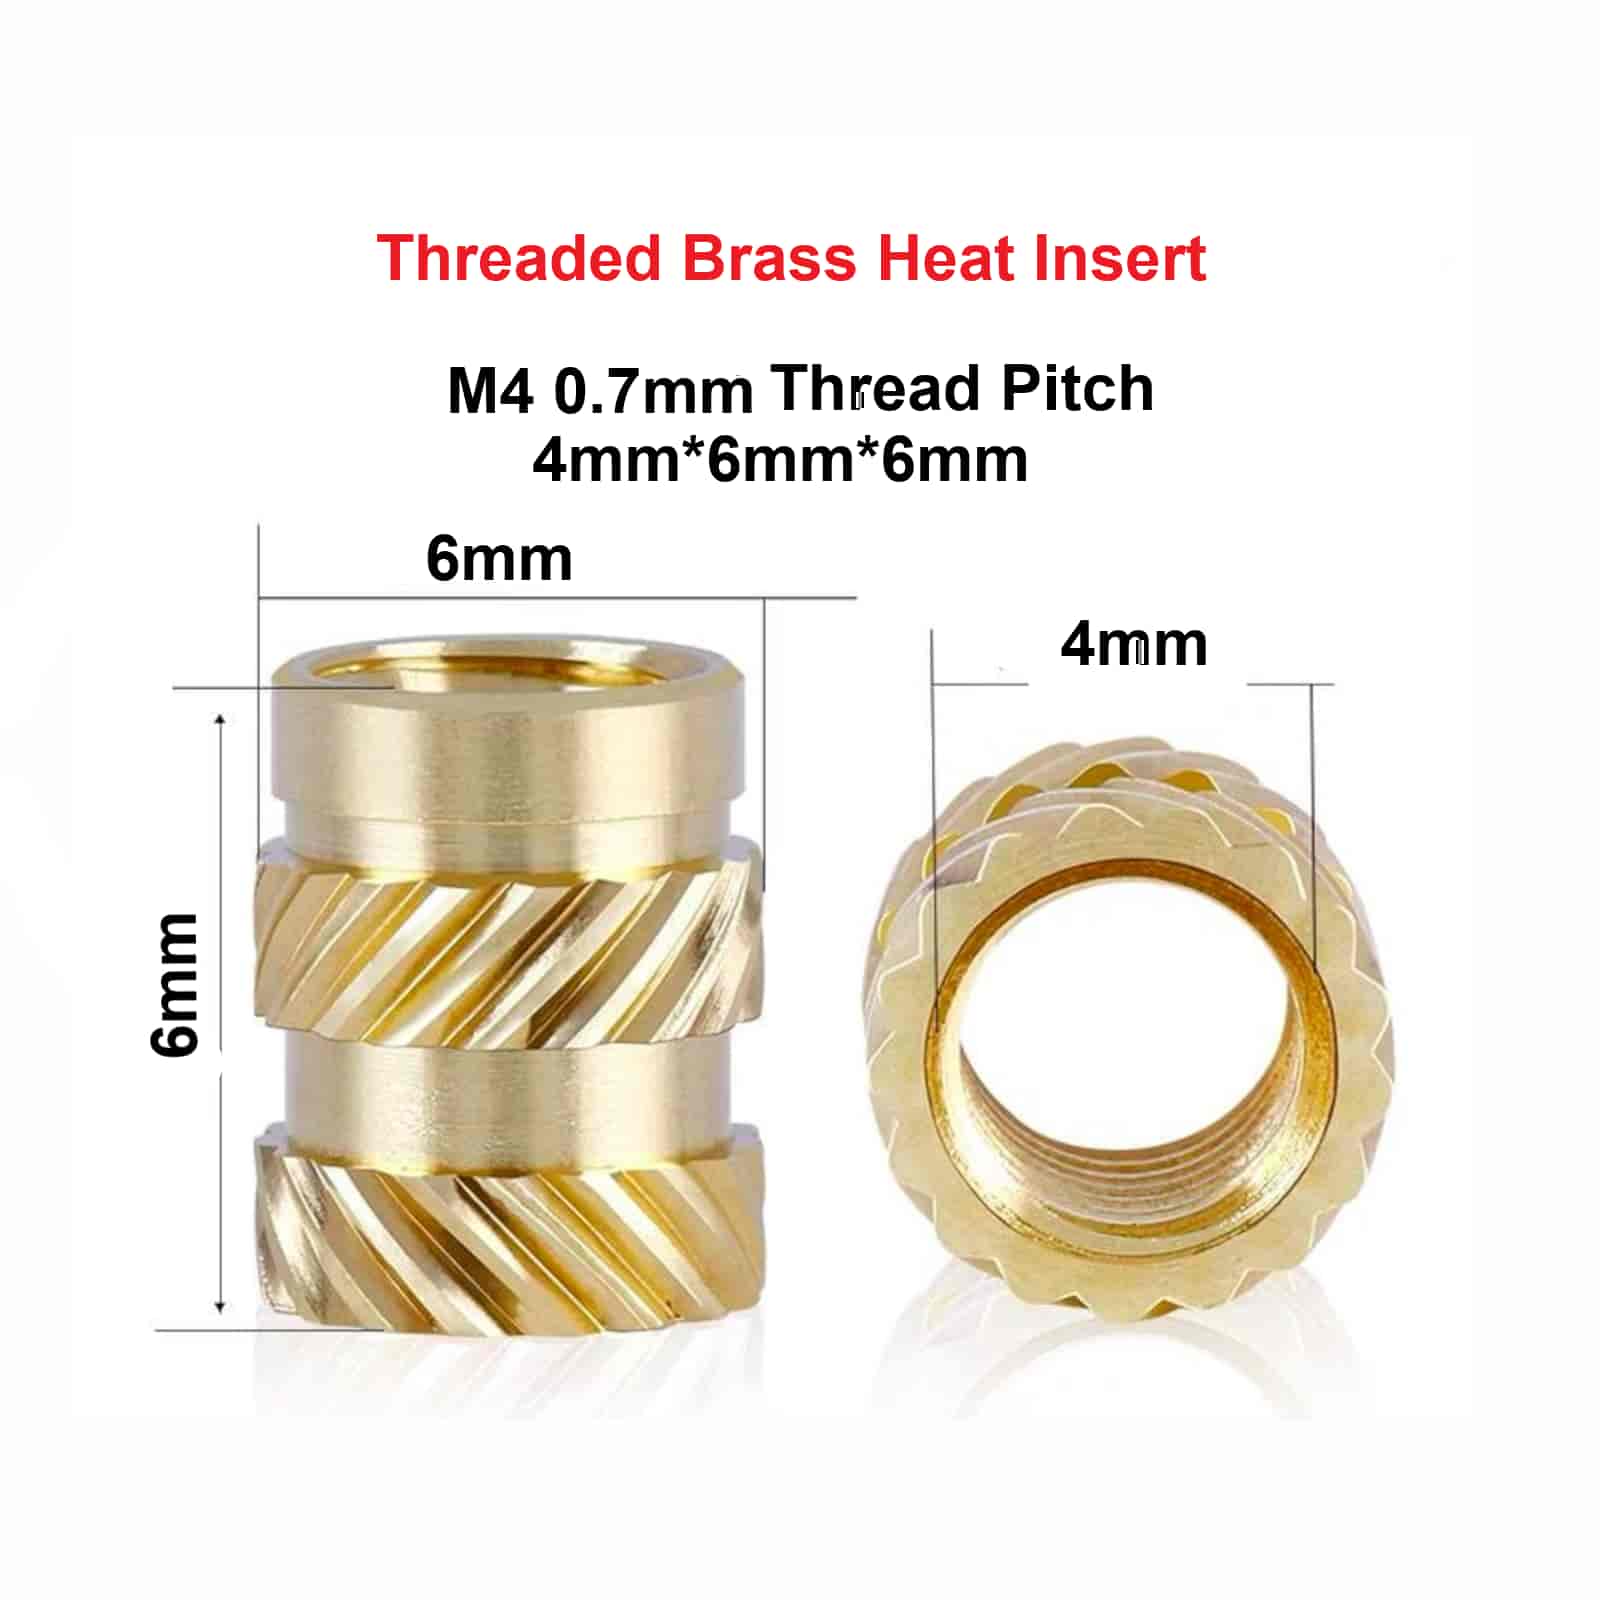
| Thread Size | Thread Pitch | Height | Width |
|---|---|---|---|
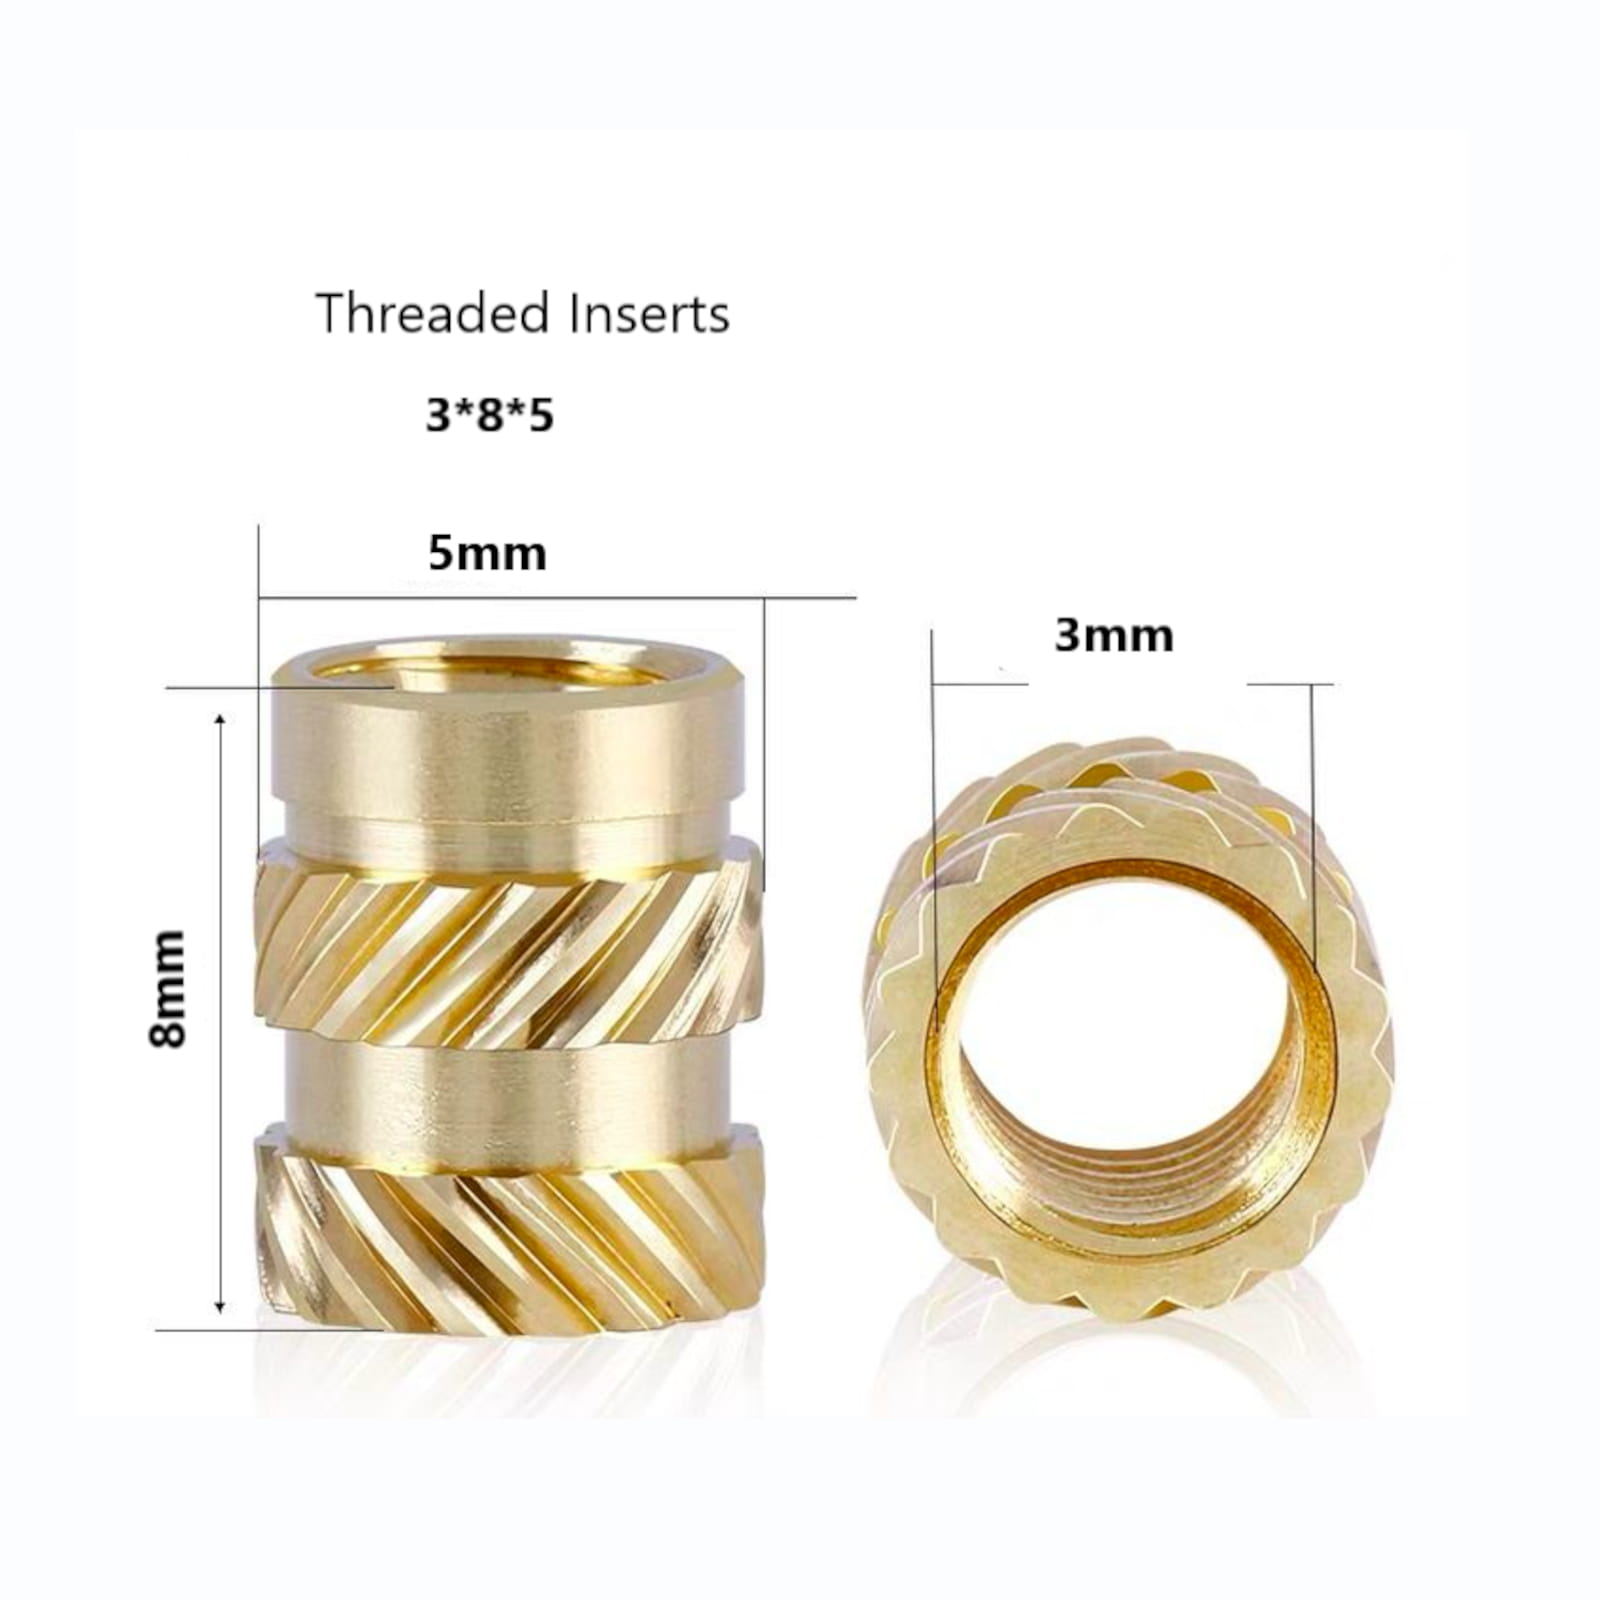
| M3 | 0.5mm | 5mm | 4.5mm |
| M3 | 0.5mm | 6mm | 4.5mm |
| M4 | 0.7mm | 6mm | 6mm |
| M5 | 0.8mm | 6mm | 7mm |
| M6 | 1.0mm | 6mm | 8mm |
Heat set inserts are useful when you need stronger threads than the plastic alone can provide. Once installed correctly, the brass insert becomes a threaded metal anchor inside the plastic part. This helps reduce thread stripping, improves screw retention, and provides a more durable fastening point for parts that may need to be opened or adjusted over time.
These inserts are well suited for 3D printed parts, printer upgrades, electronics cases, access panels, mounts, brackets, clamps, jigs, fixtures, robot parts, workshop tools, and plastic repair jobs. They can be used in new printed designs or as a repair option where threaded holes in plastic have been stripped or damaged.
Your current dnb3D product page notes that M3*5mm brass inserts are optionally used on the Voron Stealthburner and Rat Rig Eva 3. Always confirm the exact insert size required by your printed parts, assembly guide, and printer revision before ordering.
Threaded brass heat inserts are typically installed using a soldering iron or heat insert press with the correct tip. The insert is heated and pressed into a properly sized plastic hole so the surrounding plastic softens and forms around the knurled body. Proper temperature, alignment, hole size, and insertion depth are important for a clean, strong result.
Select the insert based on screw size, insert height, outside width, plastic wall thickness, printed hole size, and available part depth. A hole that is too small can deform the part, while a hole that is too large may not grip the insert properly. For best results, test your hole size on a sample print before installing inserts into a finished part.
For related parts, browse the Fasteners category or the Brass Inserts category. These inserts pair well with metric socket head screws, button head screws, flat head screws, washers, spacers, brackets, printed parts, and 3D printer hardware from dnb3D.
For printer build reference and assembly context, review the Voron 2.4 GitHub documentation or the Rat Rig V-Core 3 GitHub documentation for your specific printed part and toolhead configuration.
Every order is hand-inspected and precision-shipped from dnb3D in Marathon, Ontario. Whether you are building a 3D printer, repairing a stripped plastic hole, assembling an enclosure, or improving a printed part design, these Threaded Brass Heat Inserts provide a clean fastening solution for stronger reusable threads in plastic components.
Threaded Brass Heat Inserts or Heat Set Brass Inserts are a great practical solution of joining or fastening components together. Makes a professional and attractive appearance to your projects that is convenient and easy to use.
Threaded Brass Heat Inserts are heat-set metal inserts used to create strong reusable machine threads in compatible 3D printed and plastic parts.
| Product Type | Threaded brass heat insert / heat set insert |
|---|---|
| Material | Brass |
| Installation Style | Heat-set installation into compatible plastic parts |
| Available Thread Sizes | M3, M4, M5, M6 |
| Available Quantity Options | 1PCS, 10PCS, 25PCS |
| Common Use | Reusable threaded fastening points in 3D printed parts, plastic components, repairs, brackets, fixtures, enclosures, and printer parts |
| Optional Printer Use | M3*5mm inserts are optionally used on Voron Stealthburner and Rat Rig Eva 3 according to the current product page |
| Compatible Hardware | Matching metric machine screws based on insert thread size |
| SKU | DB-0013-4846 |
| Installation Warning | Confirm insert size, printed hole size, plastic material, wall thickness, screw length, insertion depth, and installation temperature before use. |
| Fulfillment | Hand-inspected and precision-shipped from dnb3D in Marathon, Ontario, Canada |
| Thread Size | Thread Pitch | Height | Width |
|---|---|---|---|
| M3 | 0.5mm | 5mm | 4.5mm |
| M3 | 0.5mm | 6mm | 4.5mm |
| M4 | 0.7mm | 6mm | 6mm |
| M5 | 0.8mm | 6mm | 7mm |
| M6 | 1.0mm | 6mm | 8mm |
Before installing Threaded Brass Heat Inserts, confirm the required thread size, insert height, insert width, printed hole size, plastic material, wall thickness, and screw length. The insert should match the machine screw and printed part design.
Heat set inserts are normally installed with a soldering iron, heat insert tip, or press-style insertion tool. Use controlled heat and steady pressure. Too much heat can deform the part, while too little heat can prevent the insert from seating properly.
Align the insert square to the hole before pressing it into the plastic. A crooked insert can weaken the part, misalign the screw, damage the hole, or make final assembly difficult.
The printed hole should be sized for the insert and plastic material. A hole that is too tight can bulge or split the part. A hole that is too loose may not grip the insert securely. Test your hole size on a sle print before installing into a finished component.
After installation, allow the insert and surrounding plastic to cool fully before installing screws. Moving or loading the insert while the plastic is still soft can weaken the final grip.
Use reasonable screw torque after the insert is installed. Over-tightening can pull the insert loose, damage the surrounding plastic, or strip the screw. Use washers where needed to spread cling load on soft or printed parts.
Make sure the screw length is appropriate for the insert depth and part thickness. A screw that bottoms out inside the insert or pushes beyond the insert can damage the part or loosen the insert.
Thin printed walls, small bosses, and narrow plastic features may deform during heat-set installation. If designing a part, provide enough plastic around the insert to support heat and cling force.
Keep brass inserts clean, dry, and free from dust, oil, filament debris, and loose plastic. Store unused inserts in a labeled container so thread sizes and heights do not get mixed together.
Every order is hand-inspected before shipping. dnb3D precision-ships brass inserts, fasteners, 3D printer parts, and small hardware across Canada from our Ontario facility, helping makers, builders, and repair shops receive clean, usable parts ready for careful installation.
At dnb3D, we don’t just ship boxes—we manufacture solutions. Operating our Industry 4.0 micro-factory in Marathon, Ontario, means your order is handled by the same people who design and test these components.
Ready to Ship (3D Printer Parts & Hardware): Finished, inspected, and on the shelf. Dispatched within 1 to 2 business days.
In-House Manufacturing (Laser, Plasma, 3D Prints): These items are manufactured “fresh” to order. Please allow 3 to 5 business days for precision cutting and finishing.
Custom Projects: Bespoke designs require a consultation and a locked-in timeline before production begins.
We ship nationwide across Canada and the USA. Centrally located on the North Shore of Lake Superior, we are uniquely positioned to get your products moving quickly to either coast.
We stand behind every weld, cut, and print. If a product doesn’t meet your expectations, contact the Hub within 30 days. If we wouldn’t put it in our own shop, we won’t let it sit in yours.
Standard Items: Contact us within 30 days for return authorization. Items must be in original, unused condition.
Custom/Personalized Orders: Digitally fabricated to your exact specs (names, custom dimensions, or unique finishes) are final sale once production begins.
Shipping Costs: Return shipping is the responsibility of the customer unless the item arrived damaged or defective.
Have questions about a specific build? Click here to contact the shop.